I am SO excited to begin baking for Christmas!!!
Although, mainly I'm just excited for an excuse to "taste" lots of yummy treats and use my KitchenAid Mixer several times a week.
Anyways!!! Since I had this week off from grocery shopping (for "real" food), I was able to go and focus on what I needed for the Christmas Baskets. Last year I made a lot of recipes for Christmas Baskets (including Hot Chocolate Mix, cookies, my Gram's famous fudge, and candy), but this year, I wanted to focus on making a few really great recipes and perfecting them.
So, here's what I'm making this year!!!
Apple Oatmeal Cookies. I made these last year for our baskets, and they were a big hit! Not only do they taste Christmasy (apples, brown sugar, and cinnamon), but they are diabetic-friendly, easy to make, and the whole house smells yummy ;)
Gram's Famous Fudge. This is the ultimate Christmas sweet for my mom's side of the family. It's just not Christmas without Grandma Fudge, and since she rarely makes fudge anymore (maybe one tray a year), it is such a treat to have her fudge pot, her recipe, and her blessing to work hard to recreate her magic ;) While the recipe is a family secret, I try to share the finished product with as many people as possible.
Sugar Cookies w/ Royal Icing. This is brand new to me. Even though I consider myself a cookie expert (after years of helping my dad bake 100+ dozen cookies each Christmas), I have rarely made sugar cookies. I got a highly recommended recipe for cookies that shouldn't lose their shape, and very detailed instructions and recipe for Royal Icing. I decided to do snowflakes and Christmas trees since those are pretty simple to decorate (mostly one color with small decorations/details), so they shouldn't be too difficult, right?
Chocolate Slabs Two Ways. When I saw this recipe on Pinterest, I was really excited. Not only are these chocolate slabs easy to make, they are easily customized for whatever flavors you like! I am planning on making White Chocolate Peppermint Slabs and German Chocolate Cake Slabs (Semi-Sweet Chocolate with Coconut and Walnuts). This seem quick, easy, and classy to me; I hope everyone else thinks so too!
Puppy Chow. I really liked the Chocolate Covered Pretzels I made last year, but I wanted something that would a bit easier to make. Puppy Chow was the obvious choice. It is crunchy, chocolately, sweet, and only takes 3-4 minutes to make. While there are dozens of recipes online, I had tons of friends who made this on a regular basis in college, so I memorized a basic recipe from them ;)
Even though I have a Paper to finish and two finals looming, making these treats is a great way to take a study break and celebrate Christmas a little bit every day!
Showing posts with label Christmas Baskets. Show all posts
Showing posts with label Christmas Baskets. Show all posts
Thursday, December 6, 2012

Sunday, December 18, 2011
Desserts: Brownie Almond Biscotti
I was probably most excited to make this, which is why I saved it for last. I fully embrace my Italian heritage (and my olive skin that very rarely burns!)...especially when cooking! To me, winter is not complete without cocoa and something yummy to dip in it!
Anyways, I used this recipe to make this super simple and tasty biscotti. There was a small amount of wet ingredients compared to the dry, which was hard to mix!

It was enough though! I ended up using my hands at the end to make sure all the ingredients were mixed in and to form the loaves.

After baking the loaves, cooling, slicing, and cooking the biscotti, I drizzled them with some white chocolate and sprinkled some leftover ground almonds over the top!

I thought they looked pretty nice! I let them sit out overnight in order for the chocolate to cool completely and so the cookies would be nice and hard -- perfect for dipping!

Anyways! They tasted so good!!! And it's always nice to have something pretty sitting next to your coffee or cocoa cup ;)
It cost around $4 to make 60 biscotti ($0.07 a cookie!), but I didn't have to buy any almonds (My Dad gave me a bag.), so my cost is a little less than it should have been! Still, it would only be $0.12-0.13 per cookie -- not bad at all!!!
Wednesday, December 14, 2011
Desserts: Chocolate Caramel Candy
This week has just been crazy! On top of finishing my own classes and finishing grading papers for my boss, I also have to finish making some goodies before my parents get in this weekend! Anyways, I decided today would be a perfect day to make Chocolate Caramel Candy! Not only is it very simple (mix, heat, and pour), it is made in 4 layers, each of which must be refrigerated before adding the next layer. Since I am paper-writing today, it provides the PERFECT distraction during paper-writing breaks ;)


Layer one was super easy! I put down parchment paper (so I wouldn't slice up my pan when I cut the candy), but it ended up being quite a pain! If you decide to make this, definitely go with 1) a pan you don't mind cutting up or 2) something glass or scratch-proof.

Making layer two was pretty easy, but spreading it was a bit of a pain. Because the mixture was so warm, it began melting the bottom layer! I definitely suggest letting it cool a bit before spreading.

Layer three was BY FAR the most difficult just because it took a lot longer than I thought it would. I had to melt down the caramels on low heat so they wouldn't overcook (= become brittle), which took about a half an hour! My suggestion: melt them a bit in the microwave first.

Anyway, it looked really nice once it was spread out. I wish I would have added in a bit of extra cream in order to thin it out a bit (= easier to spread by the edges), but I think it should be okay.

The top layer was the same as the bottom layer, which made it easy and predictable! I let it cool for several hours, and then I tried to cut it! It was really tough to cut through, so I ended up making lines across the top (to make sure it would be enough pieces) and let my husband cut through it for me ;)

They candy turned out great! The recipe said it would taste like Snickers, but I wasn't actually expecting it to. It did! I think I liked them more than Snickers because they were a bit creamier ;)

Monday, December 12, 2011
Directions
Directions (noun): instruction, guidance
A lot of people ask me for advice. I'm not really sure why that is, but it happens a lot. Anyways! for the last few weeks a lot of people have been asking me about the Christmas Baskets, so I thought I'd share some tips.
1. Think Big. Instead of going for only "traditional" treats (like sugar cookies, gingerbread men, etc), I looked at dozens of recipes and made a long list of things that I thought I could make well. At this point, the only things I did not write down were things I could not make (due to lack of kitchen supplies) or would not make (due to my allergy to eggs...and my husband's picky tastes!). I ended up with a list of over 2 dozens recipes (before I stopped!).
2. Consider the Recipients. As I shared in a previous blog, some of the people I was baking for would not have been able to eat a lot of the dishes I initially chose. I also wanted to make sure I had a lot of variety since I was making baskets for acquaintances whose preferences I did not know.
3. Go Small. Quality is always better than quantity in a gift like this. The best way to get quality is focus; you focus by limiting yourself. I only made a few kinds of cookies so that I could focus on those recipes. Also, by limiting the number of recipes, you can purchase better quality ingredients for each recipe. I suggest no more than 10 recipes, but at least 5 (for some variety). I decided to do 8; I picked how many of each I wanted to do: 1 cocoa mix, 3 kinds of cookies (including biscotti), and 4 kinds of bite-size candy/chocolates (including fudge). Then I narrowed down my recipe choices to match.
4. Portion Control. The goal of the baskets was to share some holiday treats, not send anyone into a sugar-induced coma until spring ;) Out of each recipe, each person gets 2 servings (i.e. 2 Snickerdoodles, 2 of each kind of pretzel, 2 of each kind of fudge, etc). Since the cocoa mix lasts for a few months, I gave each basket the same amount (4-5 servings). Again, quality is better than quantity. I was only making 2-3 batches of each item, which allowed me to purchase better quality ingredients.
5. Overestimate the Goodies; Underestimate the Basket. Basically, spend more time, money, effort, etc on what is in the basket than what the basket looks like. I bought boxes for $1 each at Target and spent about $7 on ribbon and cards for all the baskets (plus leftovers). The bottom line is that people will remember what was inside more than how it was wrapped up.
Anyways! I hoped these tips were helpful and that you will consider making Christmas Baskets part of your holiday tradition.
P.S. If you feel like it's too late for Christmas, consider birthday baskets, Easter Baskets, anniversary baskets...
Sunday, December 11, 2011
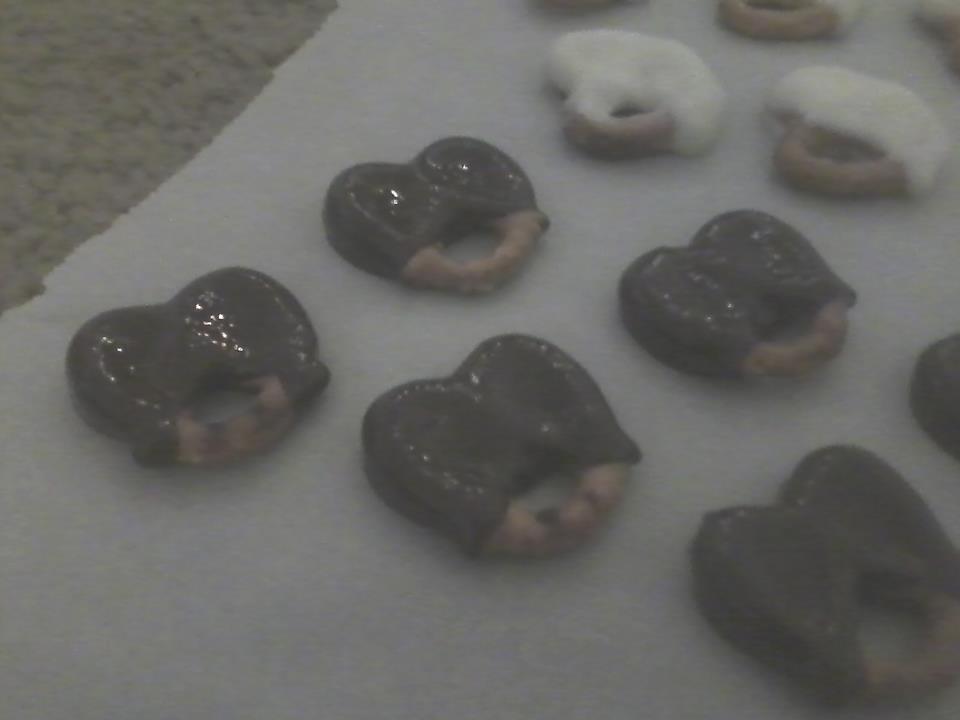
Desserts: Chocolate Coated Pretzels
After the initial "development" of my first batch of pretzels (as described here), I took a week to think about the pretzel-problem and make some other goodies ;) Anyways! A lot of people gave me several different fixes, but it was clear the the biggest problem was the pretzels, not the chocolate. The dipped pretzels became very stale overnight, but I think I found a way around that!!! Anyways, I finally had some time today to make some!
 |
| Perfectly Melted Milk Chocolate |
 |
| Milk Chocolate Dipped |
 |
| White Chocolate Dipped |
 |
| Dark Chocolate Dipped |
They set up in about 2 hours and tasted great! I guess I finally found a recipe that worked. As you can tell from the pictures, I left part of the pretzel undipped as a "signature" for my pretzels. The milk chocolate have the top right undipped, the dark chocolate have the bottom undipped, and the white chocolate have the top left undipped.

And on the upside, you can make chocolate dipped pretzels in the living room while watching football and Christmas movies ;)

And on the upside, you can make chocolate dipped pretzels in the living room while watching football and Christmas movies ;)
Saturday, December 10, 2011
Desserts: Grandma Fudge
Today's dessert is super special to my family and me. My Grandma Finnigan makes this fudge every year for Christmas and only for Christmas. There have been several methods to try to savor Gram's fudge: eating as much as possible in one sitting, taking a small bite every day to stretch it out over the holiday season, or try to make your own Grandma Fudge. While the third option is obviously the most practical, Gram is very protective over her fudge recipe. As far as I know, I am the only grandchild that has it. (That's right, cousins! Be nice to me or you will never have my Grandma Fudge!) Maybe I am the favorite ;)
 |
| My Gram and Pap Finnigan |
1. You must use a fudge pot. A fudge pot is a big, heavy pot with no non-stick or Teflon coating. I was lucky enough to get a hand-me-down fudge pot from my Gram, so I knew it would work.
 |
| Cooking the "candy" until Soft Ball for PB |
 |
| Ready to go for Chocolate Fudge |
2. You must use a wooden spoon. I don't really know why this is important, but I always listen to my Gram. She has the best fudge, so there must be a good reason.
 |
| Mixing in the last few ingredients before pouring |
 |
| Finished PB Fudge |
 |
| Finished Chocolate Fudge |
Well, as you can see, my first batch of fudge turned out pretty nicely. I made Peanut Butter fudge to practice a bit before moving on to Chocolate. It takes awhile to cool completely, but I did taste some (by scraping the fudge pot), and it tasted pretty good! I'll do a full taste comparison once its sets ;) I think my Gram will be proud!
One 9 x 13 pan of PB Fudge cost me $4.76, which comes out to about $0.05 per fudge square (if you cut anywhere from 72 to 112 pieces). The Chocolate Fudge is only slightly more expensive ($5.01) which is only 1/2 cent more per square.
Friday, December 9, 2011
Desserts: Apple Oatmeal Cookies
Tonight I decided to make the Apple Oatmeal Cookies for the Christmas Baskets! Once again, these are not a "traditional" Christmas cookie, but they made my whole house smell like Christmas! The recipe is quick and easy (and diabetic friendly). Plus, I made about 45 cookies in under a half an hour. The only difference I made was to use Semi-Sweet Chocolate Chips instead of raisins.
When I first added the wet ingredients into the dry mix, it did not look like there was enough liquid, but I kept mixing, and it was plenty!
 |
| Finished Cookie Mix |
I decided to make the cookies a bit bigger than the recipe said; here's what my cookies looked like.
 They turned out great! In order to get enough cookies out of the batch, I made the next two trays the right size cookie (using the 2-spoon scooping method). I had to bake the first tray a bit longer, but they still turned out pretty nice!
The cookies were really cakey and chewy -- it was almost like apple crisp in cookie form! Although there was no caramel in the mix, it had a caramel flavor (probably from the brown sugar). The caramel, cinnamon, and apple make it a perfect Christmas cookie! Yum-O!
Tuesday, December 6, 2011
Desserts: Snickerdoodles
Nothing beats the buttery, sugary, cinnamony goodness of snickerdoodles. (Is cinnamony a word? Well, it is now!) Although they are not a "traditional" Christmas cookie, they are my mom's favorite and (therefore) a must-add to my Christmas baking.
I set up a little "baking zone" in the kitchen; the plan for the day was to make 4 batches (120-160) of cookies.
 |
| Me and my mom |

The recipe for the cookies was really quick and easy; I had cookies mixed and ready to roll in about 5 minutes! I really wanted to make sure I made the cookies the right size so that I would end up with enough to put in the baskets, so I made the cookies balls first before rolling. Then I rolled them in the cinnamon/sugar mix. Here's how they looked!

I ended up with a few extra cookies in this batch (lucky me!), so now I have a pretty good idea of big they should be for the next few batches. I also used parchment paper on the cookie trays to keep the bottoms of the cookies from burning ;)

I let the cookies cool; they look super yummy!!! And they tasted good too! But don't tell ;)

Anyways, I spent about $2.25 in order to make 3 dozen cookies, just $0.06 per cookie! Not bad at all for a simple and yummy treat at Christmas or anytime of the year.
Thursday, December 1, 2011
Desserts: Cinnamon Hot Chocolate
Today I decided to mix up Cinnamon Hot Chocolate for the Christmas Baskets. Hot Cocoa is really simple to make (just mix ingredients), and practically everyone drinks cocoa. I chose this cinnamon mix because cinnamon makes chocolate taste...well, chocolatelier ;) Plus it adds a pop of flavor you can't find in packaged cocoa mixes.

One batch of cocoa mix

The original recipe made 3 1/2 cups of mix, so I doubled (more like quadrupled) the recipe to make enough for the baskets!!! I also made sure there was some left over for taste-testing ;) The only thing I changed from the original recipe was the marshmallows -- I just put two big handfuls on the top of each package instead of mixing them into the cocoa. After bagging, I added cute gift tags with cocoa directions and some ribbon; here are the finished products!!!

Overall, each bag cost about $1 to make -- not bad at all!!! Plus, there was almost 2 cups of cocoa leftover (and some marshmallows) that I saved for Doug and I ;)
Subscribe to:
Posts (Atom)